Thursday 30 December 2010

Silver Tape Nail Art


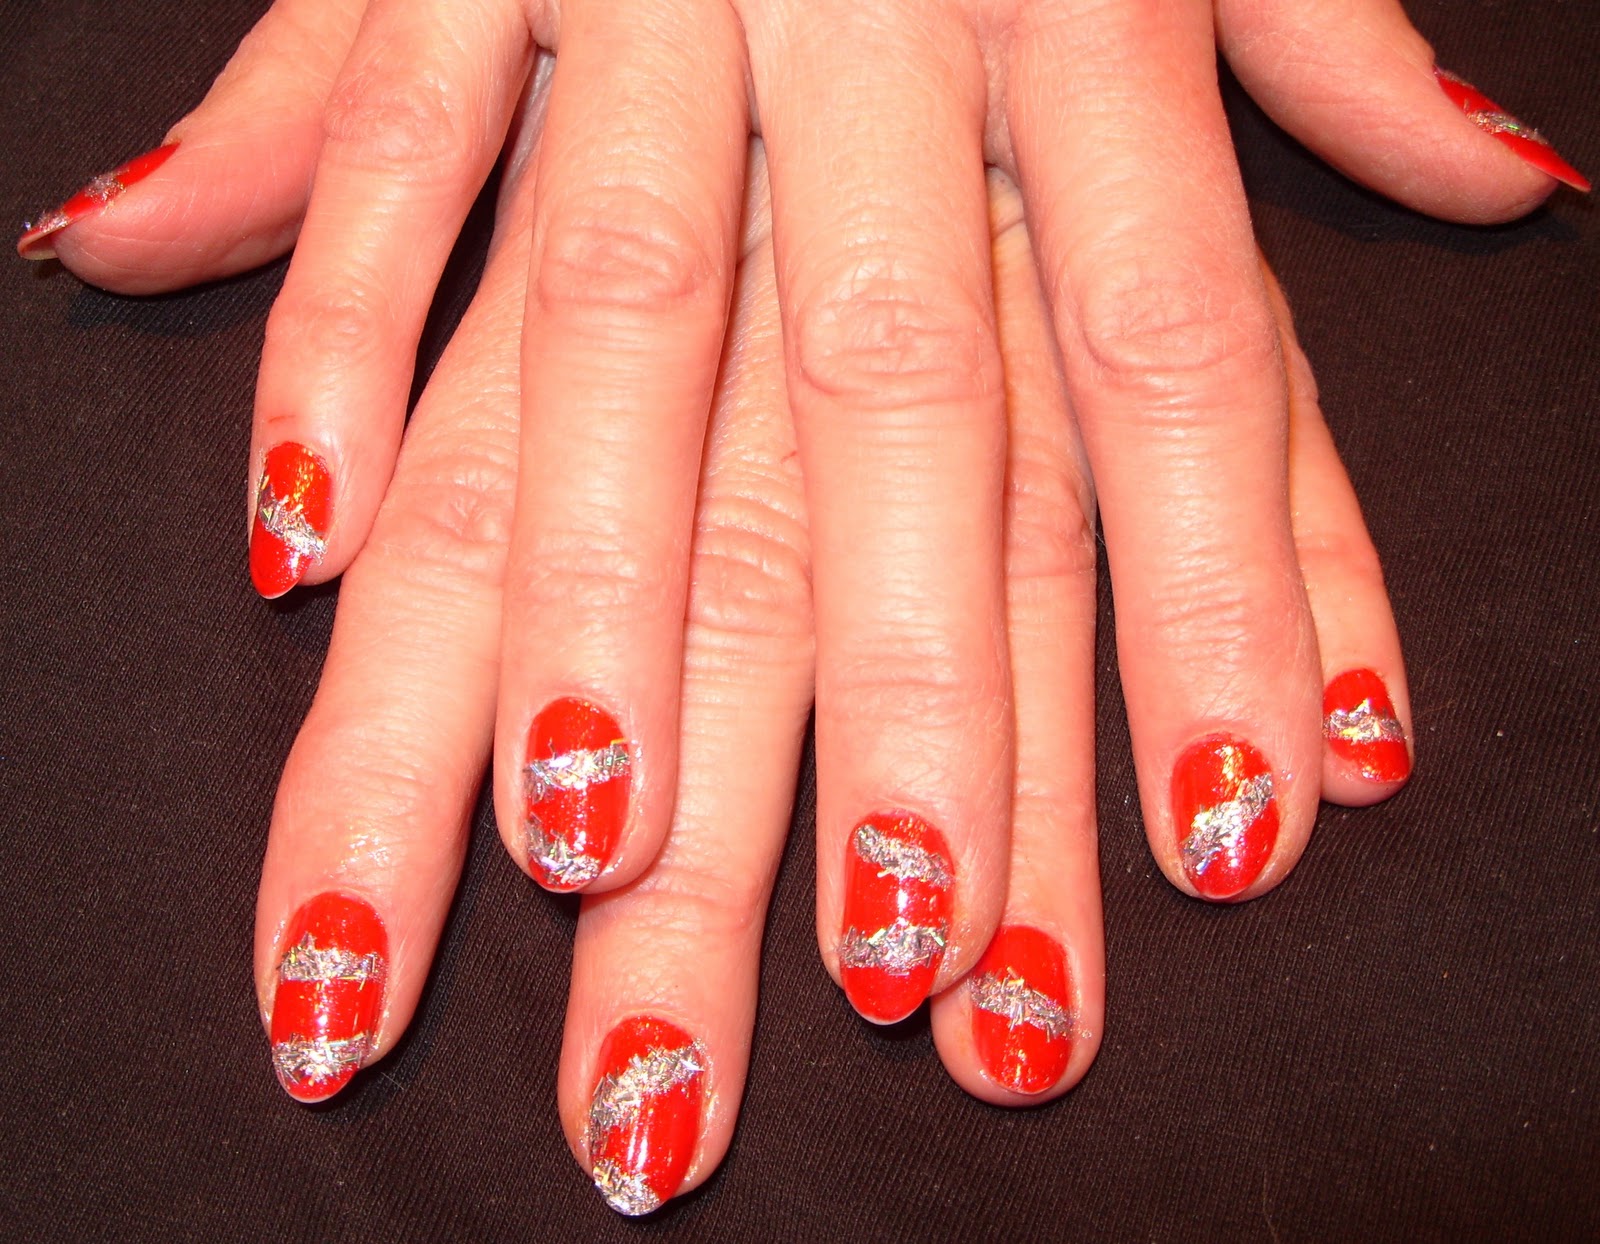
First I applied my base coat then two coats of Sex And The City Charlotte polish.


Next I used silver nail art tape (it's best to cut it as close as possible to the size you need it, then it's much easier to work with especially if you're working with your non-dominant hand) and placed two strips on the top half of my nail.


Then I carefully filled in the space between the two strips of tape with Wet n Wild Sparked and then Nyx Grafitti.


I did the exact same on my other hand, except using different colours.

For my base colour I used Illamasqua Phallic with w7 Blue Dazzle over the top.


Placed the two strips of the silver nail art tape.


Then filled the space in with AFNB Stripe & Sparkle in Brooke.


Make sure you use a good topcoat especially at the edges of the tape, you don't want the ends to keep popping up!


Blue and Gold Konad Nail Art


To begin I applied my base coat and then two coats of Sex And The City Carrie polish.


Next I used Stargazer chrome polishes in light blue and gold with GCOCL plate K05.


Finally I used the gold Stargazer polish with my dotting tool to place dots up one side of my nail and finished with a top coat.


Friday 24 December 2010

Christmas Tinsel Nail Art


To begin I applied my base coat then applied my Rimmel Whitener to the tips of my nails. I then used my matte top coat by 17 all over my nails. I wanted the base to be matte because I think it makes the glitter stand out a bit more rather than having the entire nail shiny.


Next I used OPI DS Coronation to draw random lines on my nails in a pattern that looks like tinsel on a Christmas tree. I tried to make each nail a bit different.


Then I applied strands of glitter over the OPI polish. I chose strands of glitter because it looks more like tinsel than fine glitter.


Then I carefully went over the glitter with a couple layers of my top coat because I hate my nails feeling rough so I wanted to seal everything in. Finally with my matte top coat again I tidied up around the tinsel where I accidentally got shiny top coat. I love this nail art, this is what I'll be wearing for Christmas!

Happy Holidays everyone! :)


I redid my nails for Christmas. It's exactly the same as I showed above.


I also did my mums nails, still the same except she used Avon Ruby Slippers as her base colour and didn't use the matte top coat.


Thursday 23 December 2010

Christmas Presents Nail Art


First I applied my base coat and a coat of 17 Candy Cane.


Next, with a fine nail art pen, I drew bows at the ends of my nails using Models Own Pink Lady. Then I added in the ribbon leaving tiny gaps between it and the bow.


Next I went over the bows and ribbons with Bourjois Paillettes Disco.


Finally I added a clear rhinestone in the middle of each bow and sealed it with a topcoat.


Wednesday 22 December 2010

Christmas Lights and Baubles Nail Art


First I applied my base coat and base colour, H&M Polish in Envy Me. I added a coat of OPI Text Me Text You.


Next I used my dotting tool to create random strings of dots across my nails. I used MUA Shade 4, Barry M Cyan Blue, China Glaze Lemon Fizz, China Glaze Flying Dragon and beautyuk Go Green in the same order.


Next I added different colours of rhinestones over the top of the dots and finished off with a top coat.


For my right hand I used the same base colour, H&M Polish in Envy Me. I used Nails Inc Villiers St, China Glaze Flying Dragon, China Glaze Tantalize me and 17 Catwalk Couture to create the baubles. I went over each bauble with a matte top coat by 17, missing out the base colour.


Next I used Rimmel Nail Tip Whitener, w7 Purple Dazzle, w7 Pink Dazzle, W7 Green Dazzle and Art Club Holographic Silver to add detail to the baubles. I didn't add a top coat because it would take away the matte effect of the baubles.


Starry Christmas Nail Art


To begin I applied my base coat and two coats of my base colour, Eyeko Cosmic Polish.


Next, I used GOSH Holographic with a GCOCL plate number K05 from eBay. I used the star image in the middle.


Finally I added a stripe of Art Club Hologram Glitter at the edge of my nail and sealed with a top coat.


Saturday 18 December 2010

Sparkly Glitter Nail Art


First I applied my base coat and base colour, Nails Inc Buckingham Street.


Next I used Stargazer Chrome with Bundle Monster plate BM21 using part of the star image. I stamped this onto the lower corner of my nails.


Then I drew a diagonal line across my nails with OPI Show It And Glow It! and filled in the top half with this polish. I finished off with a few coats of topcoat because I don't like my nails to be rough with the glitter.


I had trouble getting a half decent picture of this because both polishes look so similar in a still picture, they're much nicer in real life when the light hits them from different angles. I managed to take a blurry picture which I thought was pretty :)

Sparkles :)


Friday 17 December 2010

Christmas Holly and Candy Cane Nail Art


To begin I applied my base coat and two coats of Maybelline Ivory polish.


I then used H&M polish in Envy Me with the Bundle Monster plate BM14 holly image. I scraped off what would be the berries in the middle before rolling the image on my nail because I didn't want the berries to be green. I then used Nails Inc Villiers St with a dotting tool to add in the berries.


Finally I added some red rhinestones over the berries and sealed with a top coat.


For the candy cane nail art, I saw a video on youtube showing how to do this which you can watch here: http://www.youtube.com/watch?v=NtESGSQaT_A I did pretty much the same except I used different polishes.


I applied my base coat and then painted my entire ring finger with Natural Collection Nail Tip Whitener. I used sellotape to tape over my nails so I could make a clean French tip. I used the same polish to do this. I went over the white polish with China Glaze Frosty.

Next I used Nails Inc Villiers St with Bundle Monster plate BM20 striped image. I stamped my entire ring finger with this and the tips of the rest of my nails (still keeping the tape on so the base of my nail was clean).

To finish off I applied AFNB Stripe & Sparkle in Brooke along the lines where the French tip meets my nail and along the very top of my ring finger nail. I used OPI Text Me Text You as my topcoat to add a bit of sparkle.


Wednesday 15 December 2010

Christmas Tree Nail Art


To begin I applied Nail Polish by H&M in Envy Me for my base colour.


Next, I drew Christmas trees on the nails with Maybelline Ivory using a small nail art brush.


Then I used image plate BM07 from Bundle Monster (similar to Konad) with AFNB Stripe & Sparkle in Katleen. I stamped the image onto the space near the tips of the nails.


To finish I added red and green rhinestones and sealed with a top coat.


Tuesday 7 December 2010

Konad Butterflies Nail Art


To begin, I applied my base coat and base colour, OPI Mod About You. I then added OPI Princesses Rule on top.


Then after that was dry to the touch, I used Illamasqua Baptiste with the butterfly images on m36 and m54 Konad plates to stamp the images on my nails. I wanted each nail to be different so I varied which butterflies I used and how often I used them.


Next, I added purple gems on the bodies of some of the butterflies and clear gems in the surrounding areas and finally sealed everything with a topcoat.